What is Covered in This Guide
- Position-input actuator control with Arduino
- How Hall feedback position sensing works
- Parts, wiring, and motor driver selection
- Arduino sketch for serial position commands
- How the code tracks position and direction
- Calibration, units, speed, and stop accuracy
- Engineering checks before you build
- Applications and ways to expand the design
- Troubleshooting common problems
- Frequently asked questions
Position-Input Actuator Control with an Arduino
This tutorial shows how to command a feedback linear actuator to a requested position using an Arduino and a serial input. Instead of holding a switch until the actuator looks close enough, you type a target count into the Arduino Serial Monitor. The controller reads the actuator feedback pulses, decides whether the actuator should extend or retract, and stops when the measured count reaches the target.
The example is useful for prototypes where you need repeatable motion but do not yet need a full industrial motion controller. Typical projects include a camera slider, a height-adjustable test fixture, a vent or hatch mechanism, a display lift, a laboratory positioning stage, or an adjustable furniture mechanism. If you are still working out the force and geometry of the actuator itself, use the Linear Actuator Calculator Guide before building the electronics. If the actuator is lifting a hinged panel, the Hatch Lift Calculator is a better starting point because the required force changes with angle.
The original sketch used on this page was provided by Nicola Buccoliero, a mechanical engineer from Università Campus Bio-Medico in Rome, during collaborative research with the University of Pennsylvania. The code is intentionally simple: it counts rising edges from a Hall effect feedback signal and uses a basic comparison between the current count and the target count. That makes it easy to understand, modify, and debug on a bench.
The important assumption is that the actuator has an internal feedback signal. A two-wire actuator without position feedback can still be driven forward and backward through an H-bridge, but the Arduino will not know where the shaft is. For position-input control, select a feedback actuator or add an external encoder, potentiometer, or linear sensor.
How Feedback Actuators Measure Position
A feedback actuator contains a normal DC motor and gearbox, but it also includes a sensor that changes state as the internal drive screw turns. In many actuator designs this sensor is a Hall effect device that detects a magnet on the rotating assembly. Each time the magnet passes the sensor, the feedback output produces a pulse. The Arduino counts those pulses as small increments of travel.
Think of the pulse count as the actuator coordinate system. If the fully retracted position is treated as zero, then extending increases the count and retracting decreases it. The count is not automatically a distance in inches or millimeters until you calibrate it. For example, under an example assumption, if an actuator produces 360 pulses over 100 mm of measured travel, the scale factor is 3.6 pulses per mm. A command of 720 counts would then represent about 200 mm from the same zero reference. Your actuator may be different, so measure it rather than copying a number from another build.
Feedback pulses are not the same thing as closed-loop force control. The Arduino knows movement occurred, but it does not directly know load, current, temperature, or whether the mechanism is binding unless you add those measurements. For real equipment, especially where a person can contact the mechanism, add limit switches, fusing, current monitoring, mechanical stops, and safe wiring practices.
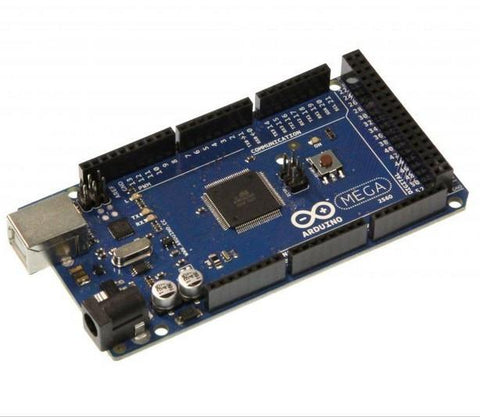
Parts, Wiring, and Driver Selection
The Arduino cannot power a linear actuator directly. It only sends logic signals to a motor driver. The motor driver, usually an H-bridge or relay-based reversing controller, switches the actuator current from a properly sized DC supply. The Arduino ground and the motor driver logic ground must share a common reference so that the feedback signal and control signals are interpreted correctly.
For the basic version of this project, you need an Arduino-compatible board, a feedback actuator, an H-bridge motor driver rated for the actuator current, a DC power supply matched to the actuator voltage, wiring sized for motor current, and a USB cable for Serial Monitor commands. The exact motor driver rating depends on the actuator datasheet and the load. Do not size the driver only for no-load current; startup and stall current are higher. For a refresher on electrical sizing, see the Amps, Volts, and Watts Linear Actuators Guide.
| Connection | Arduino side | Driver or actuator side | Builder check |
|---|---|---|---|
| Forward command | PWM pin 10 in the example sketch | H-bridge input A | Actuator should extend when this output is active, unless your mechanism defines the opposite direction. |
| Reverse command | PWM pin 11 in the example sketch | H-bridge input B | Actuator should retract when this output is active. Swap motor leads or software logic if direction is inverted. |
| Feedback signal | Digital pin 3 in the example sketch | Hall feedback output from actuator | Use Serial Monitor to confirm the count changes only when the actuator moves. |
| Logic power and reference | Arduino 5 V if required by the driver, plus GND | Driver logic supply and GND | Arduino GND, driver GND, and feedback sensor GND must share a common reference. |
| Motor power | Not connected to Arduino output pins | Driver motor supply terminals | Supply voltage must match the actuator. Current rating must cover the expected load with margin. |
Keep motor power wires physically separated from the feedback wire where practical. DC motors generate electrical noise, and long parallel wire runs can couple that noise into the feedback input. If the actuator is far from the controller, use twisted or shielded wiring for the feedback signal and test the count at both no load and under load.
Choosing a Driver Style
| Driver option | When it fits | Advantages | Limitations to check |
|---|---|---|---|
| H-bridge module with PWM inputs | Arduino speed control and frequent direction changes | Simple software control, forward/reverse from two pins, speed adjustment with analogWrite | Must be rated for actuator peak current; some low-cost modules drop significant voltage and run hot. |
| Relay reversing board | Simple extend/retract systems at full speed | Rugged and easy to understand | No practical PWM speed control through mechanical relays; relay life depends on switching current. |
| MOSFET H-bridge sized for the actuator | Higher-current or more polished custom designs | Efficient, low heat when designed correctly, good PWM performance | Requires careful design for flyback, shoot-through prevention, gate drive, and heat sinking. |
| Dedicated actuator controller | When you need a packaged solution or production repeatability | Less firmware work and often includes protection features | Less flexible than custom Arduino code unless the controller exposes the needed inputs. |
Arduino Sketch for Serial Position Commands
The following sketch accepts an integer from the Serial Monitor and moves the actuator until the feedback count reaches that integer. It is written as a learning example, so read the notes after the code before installing it in a finished machine.
// Input / Output Pins
const int motorPin1 = 10; // Pin to control the motor forward
const int motorPin2 = 11; // Pin to control the motor backward
const int sensorPin = 3;  // Pin to read the sensor

// Variables
int speed = 255; // Adjust to change actuator speed (0-255)
int sensorValue = 0;
int previousSensorValue = 0;
int motorChangeCount = 0;
int lastStoppedCount = 0;
int targetNumber = 0;
bool motorEnabled = false;
bool waitForCommand = true;

void setup() {
  pinMode(motorPin1, OUTPUT);
  pinMode(motorPin2, OUTPUT);
  pinMode(sensorPin, INPUT);
  Serial.begin(115200);
}

void loop() {
  if (!motorEnabled && Serial.available() > 0) {
    targetNumber = Serial.parseInt();
    if (targetNumber != 0) {
      Serial.print("Target number: ");
      Serial.println(targetNumber);
      motorEnabled = true;
      analogWrite(motorPin1, speed); // Move forward
      analogWrite(motorPin2, 0);     // Stop

      if (targetNumber > lastStoppedCount) {
        motorChangeCount = lastStoppedCount + 1;
      } else if (targetNumber < lastStoppedCount) {
        motorChangeCount = lastStoppedCount - 1;
      } else {
        motorChangeCount = lastStoppedCount;
      }

      waitForCommand = true;
    }
  }

  if (motorEnabled) {
    sensorValue = digitalRead(sensorPin);

    if (sensorValue == 1 && previousSensorValue == 0) {
      if (motorChangeCount < targetNumber) {
        motorChangeCount++;
      } else if (motorChangeCount > targetNumber) {
        motorChangeCount--;
      }

      Serial.print("Change from 0 to 1: ");
      Serial.print(motorChangeCount);
      Serial.print(" - Target number: ");
      Serial.println(targetNumber);
    }

    previousSensorValue = sensorValue;

    if (motorChangeCount < targetNumber) {
      analogWrite(motorPin1, speed);
      analogWrite(motorPin2, 0);
    } else if (motorChangeCount > targetNumber) {
      analogWrite(motorPin1, 0);
      analogWrite(motorPin2, speed);
    } else {
      analogWrite(motorPin1, 0);
      analogWrite(motorPin2, 0);
      motorEnabled = false;
      Serial.println("Motor stopped. Awaiting a new number.");
      lastStoppedCount = motorChangeCount;
      waitForCommand = true;
    }
  }
}

// Code by Nicola Buccoliero
How the Code Works
Pin setup and serial input
In setup, pins 10 and 11 are configured as outputs for the motor driver and pin 3 is configured as the sensor input. Serial communication runs at 115200 baud. In the main loop, Serial.parseInt reads the next integer typed into the Serial Monitor. A target of 500 means the actuator should move until the internal count equals 500. A target of 1200 means it should move farther in the positive direction. A lower target tells it to reverse.
One practical detail: this exact sketch ignores a target value of zero because of the condition targetNumber != 0. That is fine for a quick demo, but in a calibrated positioning system you usually want zero to be a valid command. A common improvement is to remove that condition and instead validate the command another way, such as checking for a line ending or using a command format like G0, G250, and G-100.
Pulse counting by edge detection
The line that checks sensorValue == 1 and previousSensorValue == 0 is looking for a rising edge. That means the code counts one event when the feedback signal changes from low to high. This is more reliable than adding to the count every time the input is high, because the Arduino loop can run many times during one pulse. Edge detection turns a pulse train into discrete position increments.
The sketch increments the count when the target is above the current count and decrements it when the target is below the current count. In other words, the target comparison is used as the direction estimate. That works for this simple system, but it is not the only way to do it. More advanced versions store the commanded direction explicitly, use interrupts for pulse capture, and include a timeout if pulses stop arriving while the motor is powered.
Motor direction and stop logic
After each loop, the code compares motorChangeCount with targetNumber. If the current count is too low, it drives motorPin1. If the current count is too high, it drives motorPin2. If the values match, both motor outputs are turned off and the last stopped count is stored. This is a simple bang-bang control method: full drive one way, full drive the other way, or stop.
Bang-bang control is easy to build and adequate for many slow linear actuator projects. It can overshoot if the actuator is fast, the load has inertia, or the motor driver does not brake quickly. If stop accuracy matters, add a slow approach zone, braking behavior supported by your driver, or a PID-style speed command. FIRGELLI has a deeper serial-control discussion in the Serial Control for Feedback Actuators Arduino Guide.
Calibration, Units, Speed, and Stop Accuracy
Establish a home reference
Pulse counts are relative unless the controller knows where the actuator started. The simplest bench method is to retract the actuator fully before powering the Arduino and define that position as zero. A better machine method is to install a home switch. On startup, the actuator retracts slowly until the switch is triggered, stops, and sets the count to zero. This prevents position errors after a power loss, manual movement, or an emergency stop.
Do not drive into the end of stroke as a normal homing method unless the actuator and mechanism are designed for that. Repeatedly stalling a motor against a hard stop can overheat components, increase current, and shorten service life. A limit switch or current-monitored homing routine is safer.
Convert counts to distance
To calibrate the actuator, clamp it safely on a bench or mount it in the mechanism without pinch hazards. Command a move, measure the actual rod or carriage travel with a ruler or caliper, and record the count change. Divide count change by travel distance to get counts per unit.
Example assumption: the actuator moves 4.000 inches while the Serial Monitor count changes by 980. The scale factor is 245 counts per inch. If you want to command 2.500 inches from home, the target is 2.500 x 245 = 612.5, so you would command about 613 counts. Repeat the measurement in both extend and retract directions. If the numbers differ, backlash or mounting compliance may be affecting the system.
Set a safe PWM speed
The speed variable is a PWM duty cycle from 0 to 255. At 255, the motor driver is commanded at full duty cycle. Reducing the value slows the actuator, but it may also reduce usable torque depending on the driver and load. Start testing with the mechanism unloaded or lightly loaded. Then test at the expected operating load. If the actuator stalls or the count stops changing while the motor output is active, stop immediately and reduce the load, increase the drive capability, or change the mechanical design.
A good refinement is a two-speed approach. Move quickly while far from the target, then switch to a lower PWM value inside a defined approach window. For example, under a bench-test assumption, a system could run at 255 until it is within 80 counts of target, then reduce to 140 for the final approach. The correct values depend on actuator speed, load inertia, driver behavior, and required repeatability.
Engineering Checks Before You Build
Position control only works well when the mechanical, electrical, and software assumptions agree. Before putting the actuator into service, work through the following checks.
| Check | Why it matters | How to verify |
|---|---|---|
| Force margin | An undersized actuator may stall before reaching position. | Calculate the load and geometry. For linear loads, compare against the approach in the Motor Sizing for Linear Motion guide. |
| Power supply headroom | Voltage sag can reset electronics or corrupt feedback readings. | Measure supply voltage during motion and during the highest expected load. Confirm the supply and wiring are rated appropriately. |
| Duty cycle | Repeated moves can overheat a motor even if each move works once. | Estimate on-time and rest time with the Actuator Duty Cycle Calculator. |
| Mechanical stops | Software can fail, wiring can loosen, and commands can be wrong. | Use physical stops and limit switches so the actuator cannot damage the structure if a count is lost. |
| Feedback integrity | Noise or missing pulses causes position drift. | Watch the count in Serial Monitor while moving at different speeds and loads. The count should change smoothly in one direction. |
| Pinch and crush hazards | Linear actuators can create high forces at slow speeds. | Guard moving parts, use emergency stop provisions, and keep hands clear during testing. |
Applications and Ways to Expand the Design
Once the single-actuator version is working, the same concept can be used in larger systems. A PC application can send target positions over USB. A Raspberry Pi can send serial commands while the Arduino handles real-time pulse counting. Buttons, switches, Bluetooth modules, or touchscreen controls can be added as the command interface. If your project needs more than one input method, the Multiple Control Inputs for Linear Actuators guide explains how to think through command priority and safe behavior.
Multiple actuators
For two or more actuators, do not simply connect motors in parallel and hope they stay synchronized. Even identical actuators can move at slightly different speeds under different loads. A synchronized system needs a feedback count for each actuator, a driver channel for each motor, and software that compares each actuator to its own target. When the actuators share a mechanical frame, add fault handling so one actuator stops if another lags too far behind. For background on wiring configurations and current sharing, see the Parallel and Series Actuator Configuration Calculator.
Preset positions
Many projects do not need arbitrary numeric commands in daily use. They need repeatable presets such as closed, half open, and fully open. After calibration, store those target counts as constants or in EEPROM. A simple command layer can map buttons to counts: button 1 goes to home, button 2 goes to service height, and button 3 goes to full extension. Keep a manual override and a homing routine so the system can recover if the stored position no longer matches reality.
Improved pulse capture
The example code polls the feedback input in the main loop. Polling is easy to read, but it can miss pulses if the loop becomes busy or if the actuator feedback frequency is high. A stronger implementation uses an interrupt on the feedback pin so the count updates immediately when an edge occurs. When using interrupts, keep the interrupt service routine short: update a volatile count variable and do the motor decisions in the main loop.
Troubleshooting Common Problems
The actuator does not move
First check motor power, not the Arduino code. Confirm the actuator voltage rating, power supply output, fuse, driver enable pins, and driver wiring. Measure voltage at the driver motor output while a command is active. If the Arduino prints the target but the motor output never changes, the issue is likely driver logic wiring or code pin assignment. If the driver output changes but the actuator does not move, check motor wiring, supply current capacity, and mechanical binding.
The actuator moves the wrong direction
If a higher target makes the actuator retract, your direction convention is inverted. Swap the motor leads at the driver output or swap the software outputs associated with extend and retract. After changing direction, retest the feedback count. The count should increase when the actuator moves in the direction you define as positive.
The count changes when the actuator is not moving
False counts usually indicate electrical noise, a floating input, or poor grounding. Confirm the feedback signal has the correct pull-up or output type for your actuator. Keep feedback wiring away from motor wiring. Connect grounds correctly. If needed, add filtering in hardware or software, but do not hide a severe wiring problem with code.
The position drifts over repeated moves
Drift can come from missed pulses, false pulses, backlash, or starting without a known home. Add a homing switch, use interrupt-based pulse counting, slow the final approach, and compare measured physical position after repeated extend/retract cycles. If drift appears only under load, check for voltage sag and mechanical flex.
The actuator stops short under load
A stop-short condition can mean the actuator stalled, the power supply current limit activated, or the driver overheated. Measure current and voltage during the move. If the required force is uncertain, revisit the mechanical calculation. A lever or angled installation can multiply the required actuator force well beyond the payload weight.
Frequently Asked Questions
Can this code be used with any linear actuator?
No. It requires a position feedback signal or an added external sensor. A basic two-wire actuator can move through a driver, but the Arduino cannot know its position without feedback.
Can I command the actuator in millimeters instead of counts?
Yes. Calibrate the actuator to find counts per millimeter, then convert the requested distance into a target count in the code. For example, if your measured ratio is 3.6 counts per mm, a 150 mm command becomes 540 counts. Use your measured value, not an assumed value.
Why does the original sketch ignore a zero command?
The line targetNumber != 0 was likely used to avoid acting on empty serial input during a quick demonstration. In a real coordinate system, zero is normally a valid position. Modify the command parser if you need to return to home by typing zero.
Do I need limit switches if I already have feedback?
For a bench demonstration, feedback alone can be enough to learn the concept. For a machine, limit switches are strongly recommended. Feedback counts can be lost after power interruption, noise, wiring faults, or software errors. Limit switches provide an independent travel boundary and a reliable homing reference.
How accurate will the final position be?
Accuracy depends on feedback resolution, actuator backlash, motor speed, load inertia, driver braking, and calibration quality. A simple bang-bang controller may stop within a few counts in a slow system, but it can overshoot in a fast or heavily loaded mechanism. Use a slow approach zone, homing, and repeatability testing if position accuracy matters.
Can one Arduino control multiple feedback actuators?
Yes, if it has enough input and output pins and the code is written for multiple counters and driver channels. Each actuator should have its own feedback input and motor driver output. For synchronized lifting, the software should monitor position error between actuators and stop the system if one actuator falls too far behind.
What is the safest first test?
Test the actuator on the bench with no load, supported so it cannot roll or pinch wires. Use a current-limited supply if available, keep one hand near the power disconnect, and start with short target moves. Confirm direction, count behavior, and stop response before connecting the actuator to a real mechanism.
Conclusion
Position-input actuator control with Arduino is a practical way to learn the fundamentals of motion control. The core ideas are simple: establish a home reference, count feedback pulses, compare the current count with a target, and drive the motor in the direction that reduces the error. The engineering work is in the details: selecting a driver with enough current capacity, protecting the mechanism with limits, calibrating counts to distance, and testing under the real load.
Use the sketch as a starting point rather than a finished safety controller. Add homing, limit switches, current monitoring, command validation, and better motion profiles as your application requires. With those improvements, the same basic architecture can grow from a bench demonstration into a reliable custom positioning system.
PWM Timer Prescaler & Period Solver (Arduino/STM32) Linear Actuator Force Calculator — Incline with Friction Actuator Speed Calculator — Extension Time Actuator Stroke Length Calculator — Hinged Applications Scissor Lift Force Calculator — Actuator Sizing


