A proximity switch is a non-contact sensor that detects an object within its sensing field using electromagnetic, capacitive, optical, or ultrasonic principles, and outputs a digital or analog signal that a controller can use to start, stop, or reverse a linear actuator. Proximity switches and sensors represent a powerful integration opportunity for linear actuator systems, enabling touchless operation, obstacle detection, and intelligent motion control. Whether you're designing an automated tailgate, building a hands-free workstation, or implementing safety features in industrial machinery, understanding how to properly select and integrate proximity sensors with your actuator system is essential for creating sophisticated, reliable automation.
In this comprehensive guide, we'll explore the different types of proximity sensors available, their technical characteristics, and practical implementation strategies for linear actuators. We'll cover everything from basic touchless switching to advanced obstacle detection systems, complete with microcontroller integration examples and real-world application considerations.
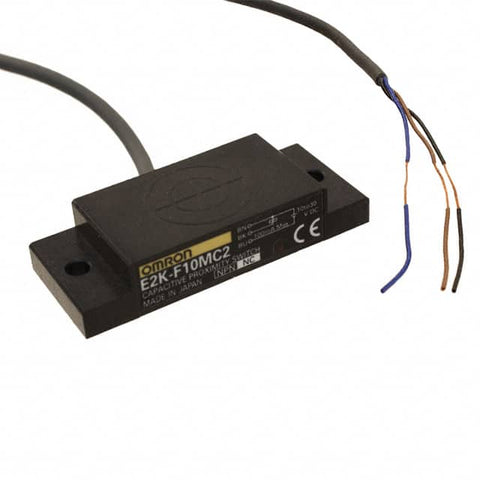
Wiring and mounting matter as much as the sensor specification. A capacitive sensor on a flexing bracket near a motor power cable will fail in ways the datasheet never shows.
"On a linear actuator, proximity sensors do work that limit switches can't — they detect what's in front of the actuator before it gets there. The internal limit switches already handle end-of-travel. What you actually need the proximity sensor for is the hand that triggers motion, or the obstacle that has to stop it." — Robbie Dickson, Founder and Chief Engineer of FIRGELLI Automations
What Are Proximity Switches and How Do They Work?
Proximity switches, also known as proximity sensors, are non-contact detection devices that can sense the presence of an object within their detection field without any physical contact. Unlike mechanical switches that require physical actuation, proximity sensors use various physical principles—electromagnetic fields, light, or sound waves—to detect target objects.
The fundamental operating principle varies depending on the sensor type, but all proximity sensors share a common characteristic: they generate an output signal when an object enters their sensing range. This output can be either a simple on/off digital signal or an analog voltage proportional to the distance to the detected object. This versatility makes proximity sensors ideal for controlling linear actuators in applications ranging from simple touchless activation to sophisticated position feedback systems.
In linear actuator applications, proximity sensors serve multiple critical functions. They can trigger actuator movement when a person approaches, stop motion when an obstacle is detected, or provide distance feedback for precise positioning. Common applications include hands-free powered tailgates in automotive systems, touchless bathroom fixtures, automated doors, industrial conveyor systems, and safety interlocks in manufacturing equipment.
What Types of Proximity Sensors Work Best with Linear Actuators?
Selecting the right proximity sensor type is crucial for successful integration with your linear actuator system. Each sensor technology has distinct advantages, limitations, and ideal use cases. Understanding these differences will help you make the right choice for your specific application requirements.
| Sensor Type | Detects | Typical Range | Best For | Weakness |
|---|---|---|---|---|
| Inductive | Ferrous and non-ferrous metals only | 1–60 mm | Industrial metal part detection, harsh environments | Cannot detect hands, plastic, or wood |
| Capacitive | Any material, including human hands | 3–50 mm | Touchless / gesture control of actuators | Sensitive to humidity; may need recalibration |
| Photoelectric | Virtually any object | mm to several meters | Long-range detection, precision positioning | Affected by ambient light, lens dust, transparent surfaces |
| Ultrasonic | Anything that reflects sound | 30 mm to several meters | Obstacle detection, distance feedback | Blind spots; struggles with foam/cloth; temperature-sensitive |
Inductive Proximity Sensors
Inductive sensors generate an oscillating electromagnetic field and detect ferrous or non-ferrous metallic objects that enter this field. When a metal object approaches the sensor, it disrupts the electromagnetic field, causing a change in oscillation amplitude that triggers the sensor output. These sensors are extremely reliable in industrial environments and are largely immune to dust, dirt, and moisture contamination.
The primary limitation of inductive sensors is that they only detect metallic objects—they cannot sense plastic, wood, or human presence directly. Detection ranges typically span from 1mm to 60mm, with larger sensors offering greater ranges. These sensors are ideal for metal part detection, position sensing in industrial machinery, and applications where the target object is metallic. They work exceptionally well in harsh environments where other sensor types might fail.
Capacitive Proximity Sensors
Capacitive sensors detect changes in capacitance caused by the presence of any object—metallic or non-metallic. They operate by measuring the change in an electric field when an object enters the sensing area. This makes them far more versatile than inductive sensors, as they can detect plastics, liquids, wood, paper, and even human hands or body parts.
Capacitive sensors typically offer detection ranges from 3mm to 50mm, depending on the target material and sensor size. They excel in touchless control applications, making them perfect for triggering linear actuators with a hand gesture. However, they can be more sensitive to environmental factors like humidity and may require adjustment or calibration in changing conditions. Their ability to detect human presence makes them the preferred choice for hands-free interfaces and touchless control panels.
Photoelectric Proximity Sensors
Photoelectric sensors use light beams—typically infrared or visible light—to detect objects. They come in three main configurations: through-beam (separate transmitter and receiver), retro-reflective (uses a reflector), and diffuse reflective (transmitter and receiver in same housing). These sensors can achieve detection ranges from a few millimeters to several meters, depending on the configuration.
Photoelectric sensors offer excellent precision and can detect virtually any object regardless of material composition. They're particularly useful when long detection ranges are required or when detecting small objects with high accuracy. However, they can be affected by ambient light conditions, dust accumulation on lenses, and transparent or highly reflective surfaces. Proper alignment is critical for through-beam and retro-reflective types. These sensors work well for position detection, object counting, and long-range presence detection in actuator systems.
Ultrasonic Proximity Sensors
Ultrasonic sensors emit high-frequency sound waves (typically 40-200 kHz) and measure the time it takes for the echo to return from a target object. This time-of-flight measurement allows them to accurately determine distance to the nearest object. Ultrasonic sensors can detect any material that reflects sound waves—solid, liquid, or granular—making them extremely versatile.
These sensors typically offer detection ranges from 30mm to several meters and are particularly effective for obstacle detection and distance measurement applications. They excel in dusty or dirty environments where optical sensors might fail, and they're unaffected by object color, transparency, or surface finish. However, ultrasonic sensors have blind spots (minimum sensing distances), can be affected by temperature and air density changes, and may not reliably detect sound-absorbing materials like foam or cloth. They're ideal for obstacle detection in automated systems, liquid level sensing, and applications requiring accurate distance feedback for feedback actuators.
Which Specifications Matter Most When Selecting a Proximity Sensor?
Beyond choosing the right sensor technology, you must consider several critical specifications to ensure proper integration with your linear actuator system. These parameters directly impact sensor performance, reliability, and compatibility with your control electronics.
Detection range defines the maximum distance at which the sensor can reliably detect a target object. Choose a range appropriate for your application—too short and the sensor won't trigger when needed; too long and you risk false triggering. Consider that actual detection range varies with target size, material, and orientation.
Response time indicates how quickly the sensor can detect an object and change its output state. For high-speed applications or fast-moving actuators, select sensors with response times in the microsecond to millisecond range. Slower sensors may be adequate for touchless user interfaces or stationary object detection.
Switching frequency specifies how many times per second the sensor can toggle between on and off states. This becomes important when detecting multiple objects on a conveyor or implementing rapid-response safety systems. Most standard proximity sensors offer switching frequencies between 10 Hz and 1000 Hz.
Operating temperature range must accommodate your application environment. Industrial sensors typically operate from -25°C to +70°C, while specialized sensors can function in extreme temperatures. Consider not just ambient temperature but also heat generated by nearby equipment, including the linear actuator motor.
Output signal type determines how the sensor interfaces with your control system. Common outputs include NPN or PNP transistor outputs (for digital signals), analog voltage outputs (0-10V or 0-5V), analog current outputs (4-20mA), and digital communication protocols (IO-Link, CANbus). Ensure compatibility with your Arduino, PLC, or motor controller inputs.
Power requirements include operating voltage (commonly 12V or 24V DC for industrial sensors, or 5V for electronic hobby modules) and current consumption. Verify that your power supply can support both the sensor and linear actuator simultaneously without voltage drops affecting performance.
What's the Difference Between a Proximity Sensor and a Motion Detector?
While proximity sensors and motion detectors are sometimes confused, they serve fundamentally different purposes and operate on distinct principles. Understanding this difference is critical when designing your actuator control system.

Proximity sensors detect the presence and distance of objects regardless of whether those objects are moving. A capacitive proximity sensor will detect your hand whether you're waving it past the sensor or holding it stationary within the detection range. The sensor responds to proximity, not motion. This makes proximity sensors ideal for touchless switches, position sensing, and obstacle detection in linear actuator systems.
Motion detectors, conversely, specifically sense movement within their field of view. Passive infrared (PIR) motion sensors, the most common type, detect changes in infrared radiation caused by moving warm objects. They will not trigger if an object remains stationary, even if it's within range. Security lighting, automated doors that open as you approach (not just when you're standing in front of them), and occupancy sensing for energy management typically use motion detectors.
For most linear actuator control applications, proximity sensors are the appropriate choice because you want to detect presence and distance, not necessarily motion. A TV lift should extend when you approach, regardless of whether you're moving or standing still. An automated standing desk with obstacle detection needs to stop if an object is in the way, not just if something is moving.
How Do You Implement Touchless Control with a Proximity Sensor?
Touchless control represents one of the most popular applications for proximity sensors in linear actuator systems. This implementation allows users to trigger actuator motion with a simple hand gesture, eliminating the need for physical buttons or switches. The result is a more hygienic, convenient, and modern user interface.
Sensor Selection for Touchless Control
For touchless control applications, select a proximity sensor with a relatively short detection range—typically 50mm to 150mm. This prevents accidental triggering while ensuring reliable activation when intentional. Capacitive sensors are often the best choice because they readily detect human hands without requiring metal targets. Ultrasonic and short-range photoelectric sensors also work well, provided they offer appropriate detection ranges.
Consider the mounting location and approach angle. The sensor should be positioned where users can naturally and intuitively trigger it. For a drawer slide application, mounting the sensor on the front face at a comfortable height allows users to wave their hand to open the drawer. For industrial applications, consider mounting height, glove compatibility, and whether the sensor can be easily cleaned.
Microcontroller Integration
Touchless control requires a microcontroller to read the proximity sensor output and control the linear actuator accordingly. An Arduino or similar microcontroller board provides an accessible platform for this integration. The sensor typically connects to a digital or analog input pin, while the actuator connects through a motor driver or relay circuit.
Most proximity sensors provide either a digital output (high/low) or an analog voltage output. For digital sensors, connect the output directly to a digital input pin with appropriate voltage level matching. For analog sensors, connect to an analog input pin and establish a threshold value that determines when the sensor is considered "triggered." Test your sensor beforehand to determine this threshold—typically by monitoring the analog reading as you move your hand closer and farther from the sensor.
Control Logic Implementation
The simplest touchless control implementation toggles between extending and retracting the actuator each time the sensor is triggered. This requires implementing a state machine with a flag variable that tracks the current direction. The code below demonstrates the main control loop logic:
void loop() {

  if (sensorFlag == 0) {

    // Extend actuator

    digitalWrite(directionPin, HIGH);

    analogWrite(pwmPin, speed);

  } else {

    // Retract actuator

    digitalWrite(directionPin, LOW);

    analogWrite(pwmPin, speed);

  }

}
The sensorFlag variable toggles between 0 and 1 each time the sensor detects a trigger event. To prevent multiple toggles from a single hand gesture, implement debouncing logic that only toggles the flag once per trigger event, requiring the sensor to return to its non-triggered state before accepting another trigger.
Timer Interrupt for Sensor Reading
Rather than continuously polling the sensor in the main loop, best practice involves using timer interrupts to periodically read the sensor value. This approach ensures consistent sampling intervals and allows your microcontroller to perform other tasks without missing sensor events. Here's an example of setting up a timer interrupt on Arduino:
ISR(TIMER1_COMPA_vect) {

  static bool lastState = false;

  int sensorValue = analogRead(sensorPin);


  if (sensorValue < threshold && !lastState) {

    sensorFlag = !sensorFlag; // Toggle direction

    lastState = true;

  } else if (sensorValue >= threshold) {

    lastState = false;

  }

}
This interrupt service routine runs at a fixed interval (configured during timer setup), reads the sensor value, and toggles the direction flag only when the sensor transitions from non-triggered to triggered state. The lastState variable prevents multiple toggles during a single trigger event.
Integration with Limit Switches
Most quality linear actuators include internal limit switches that automatically stop the actuator at full extension and retraction. These built-in limits protect the actuator from damage and eliminate the need for external end-of-travel switches in basic touchless control applications. The actuator will extend until it reaches the internal limit switch, then stop automatically. A subsequent sensor trigger will reverse direction and retract the actuator until it reaches the opposite limit.
For applications requiring intermediate positions, feedback actuators with built-in position sensors allow more sophisticated control. By reading the actuator's position feedback signal, your microcontroller can stop the actuator at any desired position rather than only at the end limits. This enables multi-position touchless control—for example, a TV lift that can stop at multiple viewing heights.
How Do You Use Proximity Sensors for Obstacle Detection and Safety?
Obstacle detection represents a critical safety feature for automated systems, particularly in applications where linear actuators operate in spaces occupied by people or where expensive equipment might be damaged by unintended collisions. Proximity sensors provide an effective solution for detecting obstacles in the actuator's path and stopping motion before contact occurs.
Sensor Selection for Obstacle Detection
Obstacle detection applications require sensors with longer detection ranges and the ability to detect various materials. Ultrasonic sensors excel in this role because they can detect any object that reflects sound waves, regardless of color, transparency, or material composition. Detection ranges from 100mm to 3000mm allow you to configure appropriate safety zones around the actuator.
Consider the sensor's beam pattern when mounting. Ultrasonic sensors typically have a cone-shaped detection field, which means the detection area increases with distance from the sensor. This characteristic can be advantageous for broad obstacle detection but requires careful consideration of blind spots. Mount the sensor facing forward along the actuator's direction of travel, positioned to detect obstacles before the actuator mechanism would make contact.
Defining Safety Zones and Threshold Values
Establish a safety zone distance that provides adequate stopping distance for your actuator. Calculate this distance by considering the actuator's maximum speed, the mass of the moving load, and the response time of your control system. A typical safety margin ranges from 50mm to 200mm, depending on application specifics. Configure your threshold value to correspond with this safety distance.
Most ultrasonic sensors provide an analog output voltage proportional to distance, or a pulse-width output that encodes distance. Read this value with your microcontroller and compare it to your predetermined threshold. When the measured distance falls below the threshold, trigger an immediate stop signal to the actuator.
Obstacle Detection Control Logic
Implement obstacle detection using a timer interrupt that continuously monitors the sensor output. The interrupt service routine should measure distance and set a safety flag when an obstacle is detected:
ISR(TIMER1_COMPA_vect) {

  int distance = readUltrasonicSensor();


  if (distance < safetyThreshold) {

    obstacleDetected = true;

  } else {

    obstacleDetected = false;

  }

}
In your main control loop, check the obstacle flag before allowing actuator extension. If an obstacle is detected, prevent forward motion but still permit retraction, as moving away from the obstacle is inherently safe:
void loop() {

  if (extendCommand && !obstacleDetected) {

    // Safe to extend

    digitalWrite(directionPin, HIGH);

    analogWrite(pwmPin, speed);

  } else if (retractCommand) {

    // Always allow retraction

    digitalWrite(directionPin, LOW);

    analogWrite(pwmPin, speed);

  } else {

    // Stop actuator

    analogWrite(pwmPin, 0);

  }

}
Multi-Sensor Safety Systems
For critical safety applications or complex mechanical systems, consider implementing multiple proximity sensors to provide complete coverage. Industrial actuators in automated machinery often use sensor arrays that monitor the entire travel path. Configure your control system to stop if any sensor detects an obstacle, creating a fail-safe architecture.
Additionally, combine proximity sensors with other safety devices such as emergency stop buttons, safety interlocks, and light curtains for comprehensive safety coverage. Your microcontroller can monitor all these inputs simultaneously and implement appropriate safety responses based on the specific situation.
What Advanced Applications and Integration Techniques Are Possible?
Position Feedback Systems
Proximity sensors can complement or augment the built-in position feedback in feedback actuators. By mounting multiple proximity sensors at specific locations along the actuator's travel path, you create discrete position markers. This technique allows precise stopping at predetermined positions without relying solely on the actuator's internal position sensor.
For example, a column lift application might use three proximity sensors to define "low," "medium," and "high" positions. The control system monitors which sensors are triggered and stops the actuator accordingly. This approach provides absolute position reference points that don't drift over time or require calibration.
Smart Control Systems with User Learning
Advanced implementations can use proximity sensor data to create intelligent control systems that adapt to user behavior. By logging when and how users trigger the touchless control, your system can predict user intent and pre-position the actuator. For instance, a standing desk could learn that you typically stand at 10 AM and automatically begin raising when you approach the desk at that time.
This requires a more sophisticated microcontroller or single-board computer capable of data logging and basic machine learning algorithms. The proximity sensor continues to provide the trigger input, but the control system makes intelligent decisions based on historical patterns.
Wireless Integration and IoT Connectivity
Integrate proximity sensors with wireless microcontroller platforms (ESP32, ESP8266, or Bluetooth-enabled Arduino) to create IoT-connected actuator systems. The proximity sensor triggers can be logged to cloud services, combined with smartphone control interfaces, or integrated into home automation systems. This allows remote monitoring of actuator status and obstacle detection events, even when you're not physically present.
What Goes Wrong When Integrating Proximity Sensors, and How Do You Fix It?
False Triggering and Sensitivity Problems
If your proximity sensor triggers unexpectedly or fails to trigger when it should, first verify the detection range and threshold settings. Environmental factors—temperature changes, humidity, electromagnetic interference, or vibration—can affect sensor performance. Capacitive sensors are particularly sensitive to humidity, while ultrasonic sensors can be affected by temperature.
Implement software filtering by requiring multiple consecutive readings above or below the threshold before triggering action. This simple averaging or majority-vote approach eliminates spurious readings caused by electrical noise or momentary environmental fluctuations.
Electrical Interference from Actuator Motors
Linear actuator motors generate electrical noise, particularly when starting, stopping, or under heavy load. This electromagnetic interference can cause false readings in proximity sensors, especially those with analog outputs. Route sensor wiring away from motor power cables, use shielded cables where possible, and consider adding capacitive filtering on the sensor power supply lines.
Separate the sensor power supply from the actuator motor supply if false triggering persists. A dedicated regulated power supply for the sensor eliminates voltage fluctuations caused by motor current draw. Adding snubber circuits or flyback diodes across the motor terminals reduces the electromagnetic noise at its source.
Response Time and Latency Concerns
If your obstacle detection system doesn't stop the actuator quickly enough, examine the complete response chain: sensor response time, interrupt service routine execution time, motor driver response time, and actuator mechanical inertia. The weakest link determines overall system response.
Increase your timer interrupt frequency to reduce sampling latency. Optimize your interrupt service routine code to execute as quickly as possible—avoid complex calculations or I/O operations within the interrupt. Consider using hardware interrupts triggered directly by sensor output changes rather than polling with timer interrupts for the fastest possible response.
How Should You Install and Mount Proximity Sensors for Actuator Systems?
Sensor Mounting and Positioning
Secure mounting is essential for reliable sensor operation. Proximity sensors are sensitive to position and orientation—even small movements can affect the detection range and accuracy. Use rigid mounting brackets or custom mounts designed specifically for your sensor model. Avoid mounting sensors to vibrating surfaces or structures that flex during actuator operation.
For touchless control applications, position the sensor at a natural interaction point where users will intuitively place their hands. Consider ergonomics, accessibility, and whether users might accidentally trigger the sensor during normal activity near the system. For obstacle detection, ensure the sensor has an unobstructed view of the entire area where obstacles might appear.
Environmental Protection
Check the sensor's IP rating (Ingress Protection) to ensure it's suitable for your operating environment. IP ratings are defined by IEC 60529 (Degrees of Protection Provided by Enclosures — IP Code). Outdoor installations, wash-down areas, or dusty industrial environments require sensors with IP67 or IP68 ratings. Indoor, protected environments can use sensors with lower ratings like IP40 or IP50.
Protect sensor lenses or active surfaces from physical damage. Even minor scratches, dirt accumulation, or material buildup can degrade performance. Install protective covers or recessed mounting where physical contact is likely. Establish regular cleaning procedures for critical applications.
Wiring and Connection Best Practices
Use appropriate wire gauge for the distance between the sensor and controller—voltage drop over long cable runs can cause unreliable operation. Follow the sensor manufacturer's maximum cable length specifications. For installations exceeding recommended cable lengths, use signal amplifiers or local processing at the sensor location.
Secure all connections with proper terminals or connectors rated for the application environment. Solder and heat-shrink connections where appropriate, or use industrial-grade screw terminals. Avoid wire nuts or twist connections in permanent installations. Label all wires clearly and document your wiring scheme for future troubleshooting.
How Should You Test a Proximity-Sensor + Actuator System Before Trusting It?
A proximity-sensor + actuator system should be validated as a complete loop — sensor, wiring, controller, motor driver, and mechanical load together — before it is relied on in service. The following test sequence catches the failure modes that cause real-world systems to misbehave.
- Threshold calibration. Monitor the sensor's analog output while moving the target through the intended trigger zone, and confirm the threshold sits well clear of ambient noise readings.
- Stop-distance measurement. Command an emergency stop at maximum actuator speed under maximum rated load, measure the actual coast distance, and confirm the safety threshold exceeds that distance by 50–100%.
- EMI test under motor load. Run the actuator through full extend/retract cycles while logging sensor output, and verify that no false triggers occur during motor start, stall, or reversal.
- Environmental test. Cycle the system through the expected temperature and humidity range — especially for capacitive sensors — and re-verify threshold stability.
- Repeat-cycle test. Run hundreds of trigger cycles with realistic targets to confirm the sensor and debouncing logic remain reliable. A sensor that works once proves the wiring, not the design.
Conclusion
Proximity sensors unlock sophisticated control possibilities for linear actuator systems, enabling touchless operation, intelligent obstacle detection, and enhanced safety features. Success depends on selecting the appropriate sensor technology for your specific application—capacitive for touchless human interfaces, ultrasonic for obstacle detection, inductive for industrial metal part sensing, or photoelectric for precision and range.
Proper integration requires attention to both hardware and software considerations: robust mounting, appropriate wiring, careful threshold configuration, and reliable control logic. Timer interrupts provide consistent sensor sampling, debouncing prevents false triggering, and directional control logic ensures safe operation when obstacles are detected.
Whether you're building a hands-free automated system, implementing safety features in industrial machinery, or creating an intelligent actuator control system, proximity sensors provide the sensing capability needed to transform basic mechanical motion into smart, responsive automation. Start with the fundamentals covered in this guide, test thoroughly in your specific application environment, and iterate on your design to achieve optimal performance.
Frequently Asked Questions
What type of proximity sensor is best for controlling a linear actuator with hand gestures?
Capacitive proximity sensors are generally the best choice for hand-gesture control of linear actuators. They reliably detect human hands at short ranges (50-150mm), don't require metal targets, and work well in typical indoor environments. Select a sensor with adjustable sensitivity so you can fine-tune the detection distance to prevent accidental triggering while ensuring reliable intentional activation. Ultrasonic sensors also work well for this application but may have a larger minimum detection distance. Photoelectric sensors can work but require careful positioning to ensure the hand reliably breaks the beam. For most DIY and commercial touchless control applications, a capacitive sensor provides the best balance of reliability, cost, and ease of integration.
How do I calculate the minimum safe stopping distance for obstacle detection?
Calculate minimum safe stopping distance by considering several factors: actuator speed, load mass, actuator stopping time (including motor driver response time and mechanical inertia), sensor response time, and microcontroller processing time. A practical approach is: measure the distance your actuator travels from the moment you send a stop command until it comes to complete rest. Add a safety margin of 50-100% to account for variations in load, speed, and response time. For example, if your actuator travels 30mm during emergency stop, configure your proximity sensor threshold at a minimum of 60-90mm. Test thoroughly under maximum load and speed conditions. For critical safety applications, consult relevant safety standards (such as ISO 13849 for machinery safety) which provide formal methods for calculating safety distances based on approach speeds and system response times.
Can I use one proximity sensor to control multiple linear actuators simultaneously?
Yes, a single proximity sensor can trigger multiple linear actuators, but this requires appropriate control electronics. Connect the sensor output to your microcontroller, then use the microcontroller to drive multiple motor drivers or relays—one for each actuator. This arrangement allows synchronized motion where all actuators extend or retract together. For more complex control, such as sequential operation where actuators move one after another, implement state machine logic in your microcontroller that coordinates the timing. Be aware that controlling multiple actuators significantly increases electrical current requirements—ensure your power supply and wiring can handle the combined current draw. Also consider whether you need independent obstacle detection for each actuator; if so, each actuator would require its own dedicated proximity sensor for safety.
Will proximity sensors work reliably outdoors or in harsh environments?
Proximity sensors can work outdoors and in harsh environments, but you must select sensors specifically rated for those conditions. Look for sensors with appropriate IP ratings—IP67 or IP68 for weather resistance, dust protection, and resistance to water ingress. Temperature rating is critical; ensure the sensor operates reliably across the temperature range of your environment, including direct sun exposure which can significantly increase surface temperatures. Ultrasonic sensors are generally more robust in dirty or dusty environments compared to photoelectric sensors, which require clean optical surfaces. Inductive sensors are extremely robust but only detect metal. Capacitive sensors can be affected by rain or humidity. Consider providing physical protection such as sunshades, protective housings, or strategic mounting locations that minimize direct exposure to weather. Regular maintenance and cleaning become more important in harsh environments.
How much power do proximity sensors consume, and will they drain my battery in mobile applications?
Power consumption varies significantly by sensor type and model. Most industrial proximity sensors draw between 10-50mA at 12V or 24V DC, translating to 0.12-1.2 watts. Small electronic hobby modules designed for microcontroller use typically consume 5–30mA at 5V, or roughly 0.025–0.15 watts. For battery-powered applications, this is usually negligible compared to the actuator itself — a 12V linear actuator under load can draw several amps, which dwarfs sensor consumption. The practical concern is not the sensor's standby draw but the actuator duty cycle. If continuous monitoring is required, choose a low-power sensor and consider a microcontroller sleep/wake strategy that only fully powers the sensor when needed.


