In an era where clean, minimalist living spaces are prized, the television presents a unique design challenge. These large displays are essential for entertainment but can dominate a room's aesthetic when not in use. Traditional solutions—wall-mounting, furniture-integrated screens, or TV lifts—each have their limitations. But what if your television could simply disappear into a cabinet and emerge on command with the touch of a button?
🎥 Video — Ikea Hack: Remote Control Slide Out TV Using an Actuator
This project demonstrates how to transform an affordable modular cabinet—the kind readily available at Ikea—into a sophisticated slide-out TV system using a track actuator and slide rails. Unlike conventional TV cabinets where the screen mounts to the front of the unit, this approach conceals the television completely inside the cabinet, with the display sliding smoothly out from the side when you want to watch. The result is a clean, integrated look that rivals custom cabinetry at a fraction of the cost.
What makes this build particularly appealing is its accessibility. You don't need advanced woodworking skills, custom fabrication, or expensive materials. The entire project uses off-the-shelf components and basic tools, yet delivers a premium automated furniture experience that most people associate with high-end smart homes. Whether you're a DIY enthusiast looking for your next weekend project or a homeowner seeking a practical solution for a multi-purpose room, this guide will walk you through every step.
Why Choose a Slide-Out TV Design
Slide-out TV configurations offer several advantages over traditional mounting methods. First, they provide complete concealment—when retracted, there's no indication a television exists within the cabinet at all. This makes them ideal for formal living rooms, bedrooms, or offices where a visible screen would disrupt the design aesthetic. Second, the side-mounting approach offers ergonomic flexibility. You can position the cabinet anywhere in the room without worrying about viewing angles, as the TV extends out into the optimal position automatically.
From a technical perspective, horizontal sliding requires significantly less force than vertical lifting, which means you can use smaller, more compact actuators while still achieving smooth, reliable operation. The mechanical advantage of slide rails means the actuator primarily needs to overcome friction rather than lift the full weight of the display—typically requiring less than 50 lbs of force even for larger televisions.
This type of installation also integrates seamlessly with existing furniture. Rather than purchasing a dedicated motorized TV cabinet (which can cost thousands of dollars), you're upgrading a standard piece with motion control components. This approach gives you the flexibility to match your existing décor while achieving the same automated functionality.
Selecting the Right Cabinet for Your Build
The foundation of this project is choosing a cabinet with the right dimensions and structural characteristics. You'll need a media storage unit with a solid back panel capable of supporting both the weight of your television and the mounting hardware. The cabinet should have an internal depth of at least 2.5 to 4 inches beyond where the TV will sit when retracted—this space accommodates the track actuator, slide rails, and mounting brackets.
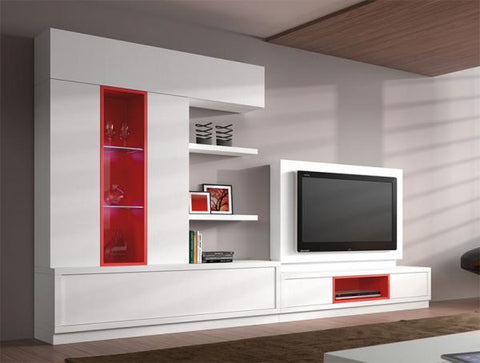

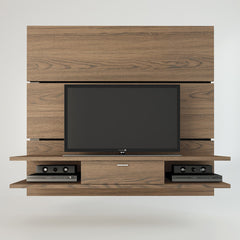
Modular storage systems like those from Ikea's Bestå, Eket, or Kallax lines work exceptionally well. These units feature sturdy panels, modular configurations, and are designed to support media equipment. Look for these key characteristics:
- Solid back panel: Avoid cabinets with thin cardboard backing. You need a panel of at least 1/2-inch thick material (particleboard or plywood) to safely mount hardware and support the TV's weight during operation.
- Adequate internal clearance: Measure the interior dimensions carefully. The cabinet must be deep enough to house your TV plus the mechanical components behind it, and tall/wide enough for the display to slide into the hidden position.
- Side access: The TV will extend from one side, so ensure that side of the cabinet is open or can be modified. Some units have removable panels that make installation easier.
- Appropriate height: Consider viewing ergonomics. The cabinet should position your TV at a comfortable eye level when seated, typically placing the center of the screen 40-50 inches from the floor.
If you're working with a cabinet that has a thinner back panel, you can reinforce it by adding a plywood backing before beginning the installation. This extra step ensures long-term reliability and safety.
Required Components and Materials
This project requires specific motion control components that work together to create smooth, reliable automated movement. Here's a comprehensive breakdown of what you'll need:
Motion Control Components

Track Linear Actuator: The track actuator serves as the motion source for this project. Unlike standard linear actuators that push or pull from the end, track actuators feature a carriage that travels along the actuator shaft. This carriage has threaded mounting holes allowing you to attach directly to your TV, creating a push-pull mechanism. For most TV applications, a mini track actuator with 12-18 inches of stroke and 50-150 lbs of force capacity is sufficient. The compact form factor fits easily within cabinet depths while providing ample power for smooth operation.
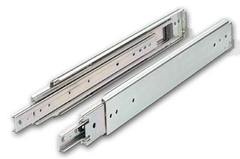
Guide Rails: Heavy-duty drawer slides or linear guide rails are essential for maintaining proper TV alignment during movement. These rails bear the entire weight of the television while ensuring smooth, straight travel. Choose slides rated for at least 150% of your TV's weight for safety and durability. Ball-bearing slides are preferable to roller-bearing types, as they provide smoother motion with less friction. The stroke length of your guide rails should match or exceed the width of your television plus a few extra inches for clearance.
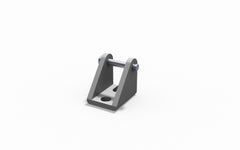
Mounting Brackets: MB1-style mounting brackets provide the interface between your actuator and cabinet structure. These L-shaped brackets allow you to securely attach the actuator at the optimal angle and position. The modular design accommodates slight variations in cabinet construction and makes alignment adjustments straightforward during installation.

Control System
2-Channel Remote Control System: A wireless remote control system provides convenient operation from anywhere in the room. The 2-channel configuration is specifically designed for single-actuator applications, with simple extend and retract functions. These systems typically include the receiver module, a handheld remote, and basic wiring harnesses. The plug-and-play design requires no programming or configuration—simply connect the actuator to the receiver, plug in power, and you're ready to operate.
Power Supply: You'll need a power supply matched to your actuator's voltage and current requirements. Most residential linear actuators operate on 12V DC and draw 3-8 amps depending on load. Choose a power supply with at least 20% more capacity than your actuator's peak draw to ensure reliable operation and longevity. The power supply should be mounted inside the cabinet with adequate ventilation.
Hardware and Tools
- Wood screws appropriate for your cabinet material (typically #8 x 1" for particle board)
- Machine screws for attaching brackets to actuator (usually M4 or M5)
- Small angle bracket or mounting tab for connecting actuator carriage to TV
- Power drill with assorted bits
- Screwdriver set
- Tape measure and level
- Pencil for marking
- Optional: wire management clips and cable concealers
All motion control components can be sourced from FIRGELLI Automations, which ensures compatibility and technical support throughout your build.
Step-by-Step Installation Process
Cabinet Preparation and Disassembly
Begin by partially disassembling your chosen cabinet to gain full access to the back panel where you'll mount the hardware. If your cabinet is already assembled, remove any shelving or internal components from the section where the TV will be housed. This creates a clear workspace and allows you to assess the structural integrity of the mounting surface.
Inspect the back panel carefully. It should be flat, solid, and free from defects. If you detect any flex or weakness, now is the time to reinforce with additional plywood backing. Mark the area where your TV will be positioned when retracted—this helps you visualize the required clearances and plan your component layout.
Many modular cabinets have a slight recess or gap between the interior panel and exterior surface. This space is ideal for housing your slide rails and actuator without adding bulk to the cabinet's external dimensions. In the example build, a 2.5-inch gap provided ample room for all mechanical components while keeping the TV flush with the cabinet's interior when retracted.
Installing the Guide Rails
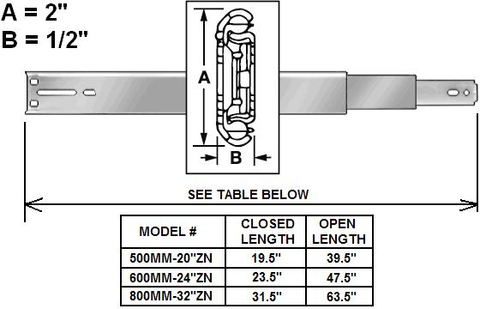
The guide rails form the foundation of smooth TV movement and must be installed with precision. Mount the fixed sections of your slide rails to the cabinet's back panel first. Position them vertically along the left and right edges of where your TV will sit, ensuring they're perfectly parallel and level with each other. Even small misalignments can cause binding during operation.
Use a level to verify each rail is plumb (vertical), then mark all screw locations before drilling pilot holes. Pilot holes prevent the particle board from splitting and ensure screws achieve maximum hold. Attach the rails with appropriate screws, checking alignment again after each rail is secured.
Next, attach the moving sections of the slide rails to the back of your television. Most modern TVs have VESA mounting holes arranged in standard patterns (200x200mm, 400x400mm, etc.). In many cases, these holes align perfectly with the mounting holes on slide rails, allowing direct attachment without additional hardware. If your TV's mounting pattern doesn't align, you may need to fabricate a simple adapter plate from aluminum or steel.
When mounting to the TV, ensure the rails are positioned identically to their fixed counterparts on the cabinet—maintaining the same vertical spacing and alignment. The moving sections should extend toward the cabinet's open side, allowing the TV to slide out fully when deployed.
Testing the Slide Mechanism
Before installing the actuator, manually test the sliding motion. Carefully align the moving rail sections (now attached to your TV) with the fixed sections on the cabinet back panel. Slide the rails together, engaging the ball bearings or rollers. The TV should glide smoothly in and out with minimal resistance.
If you encounter binding, resistance, or misalignment, stop and troubleshoot before proceeding. Common issues include:
- Rails not parallel—remeasure and adjust mounting positions
- Excessive friction—ensure rails are fully engaged and properly lubricated
- Uneven weight distribution—verify TV is centered on the rails
- Insufficient clearance—check that no cables or components interfere with travel
Cycle the TV through its full range of motion several times. It should extend completely out and retract fully into the cabinet without requiring significant force. Smooth manual operation indicates your rail installation is correct and ready for automation.
Mounting the Track Actuator
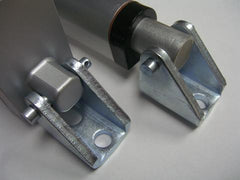
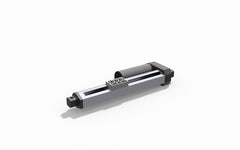

With the guide rails proven functional, you can now install the track actuator that will automate the motion. Position the actuator along the top or bottom edge of the TV's travel path, mounting it to the cabinet's back panel using MB1 mounting brackets. The actuator should be oriented so its carriage travels in the same direction as your TV's sliding motion—horizontal, parallel to the slide rails.
The MB1 brackets provide adjustment flexibility, allowing you to fine-tune the actuator's position and angle. Mount the brackets to the cabinet first using appropriate screws, then attach the actuator to the brackets. Position the actuator so its carriage can reach both the fully extended and fully retracted positions with a small margin of travel remaining at each end—this prevents the actuator from stalling at the limits.
Now you need to connect the actuator's carriage to your television. The carriage features threaded holes designed for attachments. Fabricate a simple mounting tab from thin plastic, aluminum, or steel—a piece roughly 2" x 3" is typically sufficient. Drill holes in this tab matching the carriage's mounting pattern on one end and the TV's attachment points on the other.
Secure the tab to the actuator carriage using small machine screws (the actuator will specify thread size, commonly M4 or M5). Then, carefully drill small pilot holes directly into the plastic back housing of the TV where you'll attach the other end of the tab. This sounds more daunting than it is—modern TV backs are designed to accommodate various mounting hardware, and small screws into the plastic housing do not damage internal components as long as you stay within the mounting area and don't drill too deep (typically 1/4" penetration is sufficient).
The actuator's role is simply to push and pull the TV along its path. Because the slide rails bear all the weight and constrain movement to a single axis, the actuator faces minimal resistance—typically requiring only 30-50 lbs of force regardless of TV size. This mechanical advantage is why relatively compact actuators can easily move large displays.
Wiring and Control System Setup
The electrical connections for this project are remarkably straightforward. The track actuator has two wires that connect directly to the output terminals on your 2-channel remote control receiver. Polarity matters for direction—if the actuator moves opposite to your expectation, simply reverse the two wires.
Mount the remote control receiver inside the cabinet in a location that balances two considerations: accessibility for future maintenance and signal reception for the wireless remote. The receiver should be positioned where its antenna has a clear path toward the front of the cabinet for optimal range. Secure it using the provided mounting tabs or double-sided foam tape.
Connect your power supply to the remote control receiver's power input terminals. Ensure you observe correct polarity—positive to positive, negative to negative. Most systems use color-coded wires (red for positive, black for negative) to prevent mistakes. Route the power supply's AC cord to the nearest outlet, or consider hardwiring it to a dedicated circuit if you want to eliminate visible cords entirely.
Organize all wiring using cable clips or ties to keep it neat and prevent snagging during TV movement. Leave slight service loops near connections to accommodate any movement or future maintenance. Test the electrical system before final assembly: with power applied, use the remote control to verify the actuator extends and retracts on command.
Final Assembly and Testing

With all components installed and wired, perform a complete system test before fully reassembling the cabinet. Position the TV in its retracted position and use the remote control to extend it fully. Watch carefully during the first powered cycle, ready to press the stop button if anything binds or appears misaligned.
The motion should be smooth and consistent throughout the travel range. The actuator should stop automatically when the TV reaches its fully extended position (most track actuators have built-in limit switches that stop movement at the ends of travel). Likewise, when retracting, the TV should smoothly return to its hidden position and stop automatically.
Listen for any unusual sounds—grinding, squeaking, or motor strain may indicate alignment issues or insufficient power supply capacity. The operation should be relatively quiet, with only the soft hum of the motor and the gentle sound of the slide rails moving.
Cycle the system through several complete extensions and retractions, testing from various distances and angles with the remote control to verify signal reliability. Once you're satisfied with performance, reassemble any cabinet panels you removed and clean up any visible wiring or hardware.
Optimization and Troubleshooting Tips
Even with careful installation, you may encounter minor issues that require adjustment. Here are solutions to common challenges:
TV doesn't slide smoothly: This typically indicates misaligned slide rails or insufficient lubrication. Verify that the rails are perfectly parallel and that the TV's weight is evenly distributed. Apply a small amount of silicone lubricant to the rail bearings if friction is excessive.
Actuator makes noise or struggles: Check that the actuator carriage's attachment to the TV isn't binding or angled incorrectly. The connection should allow slight pivot to accommodate any minor misalignment. Also verify your power supply provides adequate current—underpowered actuators can strain and overheat.
Remote control is unresponsive: Ensure the receiver's antenna has a clear signal path and isn't blocked by metal cabinet components. You may need to relocate the receiver or extend its antenna outside the cabinet's metal frame. Also check battery condition in the remote.
TV extends unevenly: This suggests one side is encountering more resistance than the other. Verify both slide rails are properly installed and bearing equal weight. The actuator push point should be centered on the TV to maintain balanced force distribution.
System stops before full extension/retraction: Actuator limit switches may be triggering early. This sometimes happens if the actuator stroke is slightly too short for the required travel. You can adjust the mounting position to provide additional stroke, or in some cases reprogram the limit switch positions (consult your actuator's documentation).
Design Variations and Upgrades
Once you've mastered the basic build, consider these enhancements to expand functionality:
Smart Home Integration: Replace the basic remote control with a WiFi-enabled control box that allows smartphone operation and integration with home automation systems like Alexa, Google Home, or Apple HomeKit. This enables voice control and scheduling capabilities.
Dual-TV Configuration: Larger cabinets can accommodate two slide-out TVs moving in opposite directions from a center divider. This requires synchronized control of two actuators using a multi-channel system, creating a dramatic effect for media rooms or commercial installations.
Swivel Function: Add a rotary actuator or motorized TV mount to the extended platform, allowing the TV to both slide out and rotate for optimal viewing angles. This is particularly useful in open-concept spaces where viewing positions vary.
Sensor Automation: Integrate motion sensors or door switches that automatically extend the TV when someone enters the room or opens the cabinet door. This creates a truly automated experience requiring no manual control.
Custom Fascia: Design a decorative panel that moves with the TV, maintaining the cabinet's finished appearance whether the TV is extended or retracted. This can incorporate artwork, fabric panels, or other decorative elements that match your room's design.
Safety Considerations
While this is a straightforward project, several safety factors deserve attention:
Weight Capacity: Never exceed the rated capacity of your slide rails or actuator. Most residential systems are designed for TVs up to 100 lbs, but verify specifications for your specific components. Factor in a safety margin—if your TV weighs 60 lbs, use components rated for at least 90-100 lbs.
Structural Integrity: Ensure the cabinet's back panel is securely attached to the cabinet frame and capable of supporting the cantilevered weight of an extended TV. If you have any doubts about structural adequacy, reinforce with additional support brackets or backing panels.
Pinch Points: The sliding mechanism creates potential pinch points where fingers (especially children's) could be caught. Consider adding soft close features or guards to prevent access to moving parts during operation. Educate family members about keeping clear during movement.
Electrical Safety: All wiring should be properly insulated and secured away from sharp edges or moving parts. Use appropriate wire gauge for current loads—undersized wire can overheat. Ensure your power supply is rated for the actuator's requirements and has appropriate overcurrent protection.
Tip-Over Prevention: A TV extending from a cabinet creates a moment arm that could potentially tip the unit forward, especially if it's not secured to the wall. Use furniture anchors or wall brackets to prevent tip-over accidents, particularly in homes with children.
Cost Breakdown and Value Analysis
One of this project's most appealing aspects is its cost-effectiveness compared to commercial solutions. A complete motorized TV cabinet from specialty furniture retailers typically costs $2,000 to $5,000 or more. This DIY approach achieves similar functionality for significantly less:
- Modular cabinet: $150-400 depending on size and finish
- Track actuator: $120-180
- Heavy-duty slide rails (pair): $40-80
- 2-channel remote control system: $60-90
- Power supply: $25-45
- Mounting brackets and hardware: $30-50
Total project cost typically ranges from $425 to $845, depending on cabinet selection and TV size. This represents savings of 60-80% compared to commercial alternatives while delivering comparable or superior functionality. The modular approach also means you can upgrade individual components over time—adding smart home integration or upgrading to a larger TV without replacing the entire system.
Conclusion
Transforming a standard modular cabinet into an automated slide-out TV system demonstrates the power of accessible motion control technology. What once required custom cabinetry and professional installation is now achievable as a weekend DIY project using readily available components and basic tools. The result is a sophisticated piece of automated furniture that enhances your living space's functionality while maintaining a clean, uncluttered aesthetic.
This project exemplifies the broader trend of bringing industrial motion control technology into residential applications. The same linear actuators that power automotive systems, medical equipment, and manufacturing automation can now transform everyday furniture into responsive, intelligent objects. As these components become more accessible and affordable, the possibilities for creative home automation projects continue to expand.
Whether you're hiding a TV in a bedroom, creating a multi-purpose media room, or simply seeking a cleaner aesthetic in your living space, this slide-out TV system delivers a premium experience at a fraction of commercial alternatives' cost. With proper planning, careful installation, and attention to detail, you'll create a conversation-piece furniture system that performs reliably for years while seamlessly blending technology into your home's design.
Frequently Asked Questions
What size TV can I install with this slide-out system?
The maximum TV size depends on your cabinet dimensions and the load capacity of your slide rails. Most heavy-duty drawer slides rated for 150-200 lbs can safely support TVs up to 65 inches (typically 50-70 lbs). The limiting factor is usually cabinet depth—you need enough interior space to house the TV plus 2.5-4 inches for the actuator and rail mounting hardware. Measure your cabinet's internal dimensions carefully and ensure the TV fits completely inside when retracted with adequate clearance on all sides. For TVs larger than 55 inches, consider using industrial-grade linear guides instead of standard drawer slides for enhanced stability and longevity.
How fast does the TV extend and retract?
Extension speed depends on your actuator's specifications, typically measured in inches per second. Most residential track actuators operate between 0.5 to 1.5 inches per second. For a TV that extends 24 inches from the cabinet, expect the complete extension cycle to take approximately 15-45 seconds. Slower speeds generally provide smoother, quieter operation and place less stress on the mechanical components. If faster operation is important, select an actuator with higher speed ratings, though this may increase noise levels and power consumption.
Can I install this system in existing furniture I already own?
Yes, provided your existing furniture meets the structural requirements. The critical factors are: (1) a solid back panel at least 1/2 inch thick capable of supporting mounting hardware, (2) sufficient internal depth to house the TV plus mechanical components, (3) adequate clearance for the TV to slide in and out without obstruction, and (4) overall structural integrity to handle the cantilevered weight. Before purchasing components, carefully measure your furniture and verify it can accommodate the installation. You may need to add reinforcement to the back panel or modify internal shelving to create the necessary clearances. Cabinet-style furniture works better than open shelving units, which typically lack the solid mounting surfaces required.
What maintenance does this system require?
This type of automated furniture requires minimal maintenance. Every 6-12 months, inspect the slide rails and apply a small amount of silicone-based lubricant to the bearing surfaces if you notice increased friction or noise. Check all mounting screws to ensure they remain tight, as vibration over time can cause gradual loosening. Verify the actuator's electrical connections remain secure and free from corrosion. Clean dust and debris from the slide rails using compressed air or a soft brush—accumulated dust can increase friction and accelerate wear. The actuator itself is typically sealed and maintenance-free, though you should listen for any changes in motor sound that might indicate developing issues. With proper installation and occasional inspection, these systems typically operate reliably for many years with no significant maintenance.
Will this work with a curved TV or OLED display?
Yes, the slide-out mechanism works with curved TVs, OLED panels, and any other display technology, as the system doesn't contact the screen itself—all mounting is to the TV's back panel using standard VESA patterns or custom brackets. However, you must ensure adequate clearance within the cabinet. Curved TVs project slightly forward from their mounting plane, so you may need additional depth clearance. OLED panels are typically thinner and lighter than traditional LCDs, which can actually simplify installation by reducing depth requirements and weight load. The key is measuring your specific TV's dimensions, including any protrusions from curved screens or rear-mounted connection ports, and ensuring your cabinet provides adequate clearance throughout the travel range. Test fit the TV inside the cabinet before installing any hardware to verify it doesn't contact cabinet walls or internal structures during movement.


