Getting the right balance between aperture, shutter speed, and ISO is a core engineering challenge in any imaging setup. If one of them is off, your image will end up overexposed, underexposed, blurry from motion, or filled with noise. The Camera Exposure Triangle Calculator here lets you solve for shutter speed, aperture, ISO, or exposure value (EV) based on any three input values. This is relevant whether you’re working in photography, cinematography, machine vision, or engineering applications involving light and sensors. The rest of this page lays out the main EV formula, sample problems, engineering explanations, and real-world troubleshooting in a Q&A format.
What is the exposure triangle?
The exposure triangle is just three settings: aperture (how wide the lens opens), shutter speed (how long you let light in), and ISO (how much you amplify the sensor signal). Any change in one parameter directly changes exposure. If you want to keep exposure consistent, changes in one require compensating changes in at least one of the others.
Simple Explanation
Picture filling a bucket. The aperture is the pipe diameter, shutter speed is how long you run the tap, and ISO is how much you boost the collected volume afterwards. A big pipe for less time can fill as much as a small pipe left on longer. ISO is just like turning up the volume: you make the signal louder but you also bring up the background noise.
📐 Browse all 1000+ Interactive Calculators
Exposure Triangle Diagram

Camera Exposure Calculator
How to Use This Calculator
This calculator is intended for education, concept evaluation, and preliminary design. Results are based on the equations and assumptions described on this page, but cannot account for every real-world load case, tolerance, material property, environmental condition, installation detail, safety factor, code, or regulatory requirement. Verify all inputs, assumptions, units, and results independently before selecting components or using the result in a real application. Safety-critical, structural, medical, lifting, transportation, or regulated applications must be reviewed by a qualified engineer.
- Pick your calculation mode (what you want to solve for).
- Enter your known values: aperture (f-stop), shutter speed (in seconds), and/or ISO as required.
- Fill in any extra fields if needed for the chosen mode.
- Click Calculate to get your result.
Camera Exposure Triangle Interactive Visualizer
Try out how aperture, shutter speed, and ISO shift around to keep exposure constant. As you tweak one, you’ll see immediately what the other two need to do.
EXPOSURE VALUE
EV 10.0
DEPTH OF FIELD
Medium
NOISE LEVEL
Low
FIRGELLI Automations — Interactive Engineering Calculators
Exposure Equations & Formulas
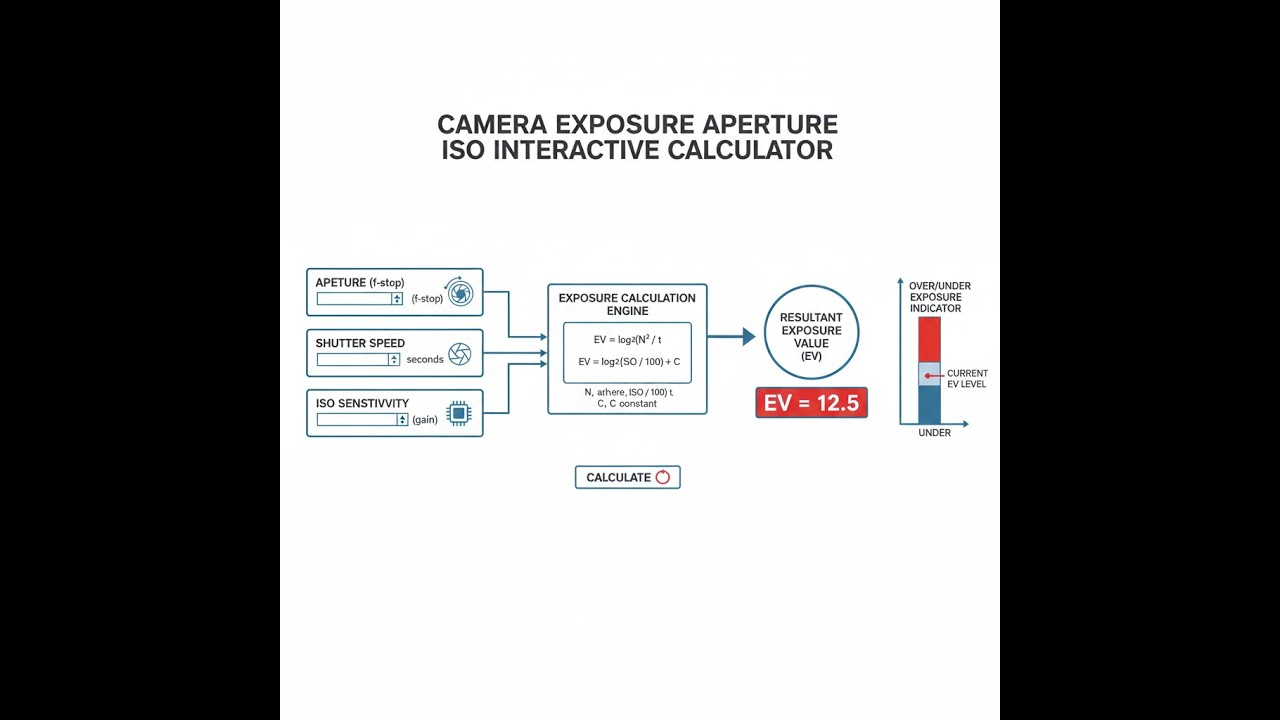
This is the main formula for exposure value, linking aperture, shutter speed, and ISO:
Exposure Value (EV)
EV = log2(N² / t) + log2(S / 100)
Where:
- EV = Exposure Value (dimensionless)
- N = f-number (aperture, dimensionless ratio)
- t = Shutter speed (seconds)
- S = ISO sensitivity (ISO units, typically 100-12800)
Equivalent Exposure Relationship
To keep total exposure the same while changing settings, use:
t1 × S1 / N1² = t2 × S2 / N2²
Where:
- Subscripts 1 and 2 represent two different exposure settings
- Maintaining equality ensures identical total light reaching the sensor
Stop Difference Calculation
To find out how many stops apart two exposures are, use:
Δstops = log2(E2 / E1), where positive means setting 2 is brighter
Where:
- Δstops = Difference in exposure stops
- E = Relative exposure (t × S / N²)
- Each stop represents a doubling or halving of light
Component Stop Changes
The exposure impact from each parameter on its own:
Aperture stops = 2 × log2(N1 / N2)
Shutter stops = log2(t2 / t1)
ISO stops = log2(S2 / S1)
Note: Aperture uses 2× multiplier because f-number relates to area (diameter squared).
Simple Example
Shooting outside on an overcast day with a scene at about EV 10, you want to use f/5.6 and ISO 400.
- Inputs: aperture = f/5.6, ISO = 400, target EV = 10
- EV equation: 10 = log₂(5.6² / t) - log₂(400 / 100)
- Solving: t ≈ 1/250 second
- Result: f/5.6, 1/250s, ISO 400 — a solid, handheld exposure for cloudy daylight.
Theory & Engineering Applications
The exposure triangle is a working example of engineering trade-offs in optical imaging. In practice, exposure is not just about plugging numbers into a formula—sensor limits, lens performance, and signal noise mean you have to choose priorities and accept some compromises. Aperture, shutter, and ISO each affect both exposure and secondary qualities like depth of field, motion blur, and noise, so you can’t optimize everything at once.
The Physics of Aperture and Light Transmission
The f-number (N) is the focal length divided by the diameter of the entrance pupil: N = f/D. But light doesn’t track with diameter; it tracks with area—so light transmission changes with the square of the ratio. Close your aperture from f/2.8 to f/4, and the diameter shrinks about 1.4×, but area (and light) halves. This squared relationship is why fast lenses (f/1.4, f/1.2) let in far more light than moderate ones: f/1.4 gives you 4× what f/2.8 does, not 2×.
Wide apertures aren’t a free lunch. They quickly reveal lens aberrations—comas, ghosts, edges getting soft—because the light angles come in more extreme. Correcting these takes complex lens designs and expensive coatings. That’s why you’ll see rapidly increasing prices as you move to truly wide aperture primes.
Shutter Speed and Temporal Integration
Shutter speed defines how long light piles up on the sensor. Double the exposure time and you double the light gathered, no surprises there. But mechanics come into play with traditional shutters: at high speeds, you’re not really opening and closing, you’re running a slit across the sensor. At 1/8000 second, the sensor "sees" only a moving gap, not the whole frame at once, which is why you get rolling shutter effects—and why syncing flashes gets tricky at high speeds.
Switch to electronic shutters, and you lose moving parts, but run into other limitations. Most consumer sensors use rolling readout, passing row by row; at high speeds, this means each line is sampled slightly later than the last, so fast-moving objects bend or skew. Global shutter sensors can avoid this but are less common and more expensive in average cameras.
ISO Sensitivity and Signal Amplification
ISO in digital cameras is not a real change in sensor sensitivity; it works by boosting the analog signal. The photodiodes always convert a photon to an electron at the same efficiency. Raising ISO just amplifies the small voltage generated—if you set ISO 3200, you’re amplifying the signal (and the noise) 32 times more than at ISO 100. Low ISO means minimal amplification, and thus minimal noise, but the signal needs to be strong enough in the first place.
The downside is that amplifying a weak signal brings up noise right along with it—thermal noise, readout noise, and unavoidable shot noise. Dual-gain sensors and better amplifiers help, but there’s no magic way to dodge the noise penalty from very high ISO, especially in the shadows. This physical reality sets an upper boundary for clean exposure, even as cameras improve.
Worked Engineering Example: Wildlife Photography System Design
A wildlife photographer wants sharp photos of birds in flight. The scene light level is EV 11 (overcast daylight). He’s got a 600mm f/4 lens and the birds move at 15 m/s, about 20 meters away.
Step 1: Calculate Needed Shutter Speed for Motion Blur
With a 600mm lens on a full-frame sensor (36mm wide), the field of view is roughly 3.4° across. If the bird sweeps across this at 15 m/s, that’s about 43 degrees/second. To keep motion blur to half a pixel (6 μm on a 24MP sensor), you want image motion under 3 μm on the sensor. At 600mm, 3 μm translates into about 5 × 10⁻⁶ radians. That gives you a max shutter of about 6.7 μs. But realistically, the typical rule is 1/(2×focal length)—so 1/1200s, but for fast movement, you want even faster: about 1/5000s.
Step 2: Find Exposure Settings that Fit That Shutter
Now use the exposure equation with EV 11, f/4, and 1/5000s. Plug in the numbers—you end up requiring ISO far under the physical minimum (impossibly low). This means with that much light and that fast a shutter, even at base ISO and f/4 you don't have enough time to capture a proper exposure. To get a correct exposure at 1/5000s, you either have to open the aperture more (if possible), wait for brighter conditions, or accept higher ISO and accompanying noise.
Step 3: What to Actually Do
This is a textbook example of running into physical limits: you can’t cheat the available light or the lens’ aperture. You’ll have to either:
- Option A: Raise the ISO, e.g. ISO 4000, to make up the 5.3 stops shortfall; you get your shot, but it will likely be noisy.
- Option B: Wait for much brighter conditions, like shooting in full sunlight (EV 16), where you actually can get f/4, 1/5000s, ISO 100 without problem.
- Option C: Use an even faster lens (f/2.8 or faster), which are rare, heavy, and expensive but let you drop ISO.
Bottom line: Sometimes, the scene simply doesn’t support the settings you want, which is why you can’t always shoot what you want under all conditions without trade-offs.
Advanced Applications in Machine Vision
Machine vision often runs at fixed frame rates (say, 120 fps), so you get your exposure time dictated by the system. Strong strobe lighting can provide high EV, but you usually hit limitations with lens aperture (for depth of field) or sensor noise (at high ISO). For example, a board inspection system at f/8 and 1/120s in EV 14 light may end up running ISO 200-400—standard for most industrial sensors. If your lighting or optics don't support the inspection specs, you’ll know before you order hardware.
Similar calculations apply in advanced imaging, like HDR (high dynamic range) techniques, where you take multiple exposures spaced by a set number of stops to capture everything from shadows to highlights. The calculator will tell you what stop intervals and exposure progression are feasible for your subject or hardware.
Practical Applications
Scenario: Event Photographer Managing Mixed Lighting
Marcus is photographing an event that jumps from bright outdoors (EV 13) to a dim ballroom (EV 7). He’s on a 24-70mm f/2.8 and wants 1/125s minimum to avoid shake. The calculator tells him that his outdoor settings of f/5.6, 1/250s, ISO 100 become ISO 3200 indoors at f/2.8, 1/125s to keep the same exposure. That’s a full 5 stop difference, which immediately shows he’ll need to accept some image noise or add light. Marcus chooses to use his on-camera flash, gets a 1 stop advantage, and drops ISO to 1600. He knows what to expect from his equipment because of this specific stop calculation, not by guessing after the fact.
Scenario: Cinematographer Planning Drone Flight Shots
Elena is shooting drone footage at sunset (EV 14) with a fixed f/2.8 lens and 1/50s shutter for a "cinematic" look. The required ISO turns out to be 12—well below the minimum ISO 100 her camera supports. Using the calculator, she learns she’s 3 stops overexposed and will need to buy an ND8 (3-stop) filter to bring the exposure in line before she ever leaves for the shoot. If she hadn’t run the numbers up front, she’d risked blowing out the sky and wasting daylight at the location.
Scenario: Astrophotographer Balancing Star Trails vs. Point Stars
David wants Milky Way shots at EV -2 (almost pitch dark) with a 14mm f/2.8 at ISO 6400. The "500 rule" says he can use up to 35s before stars blur, but the calculator shows that at these settings, his image will be significantly overexposed for an EV -2 scene. Adjusting to match the dark sky EV, he works out that 6–12 seconds is a better shutter range, even allowing him to close down the lens a stop for improved sharpness. The tool saves him from trial-and-error in the field and gives better, sharper frames by identifying optimal parameters before shooting.
Frequently Asked Questions
▼ Why does changing aperture by one stop require doubling or halving shutter speed instead of a linear adjustment?
▼ How do I account for lens-specific factors like T-stops, filter factors, and extension tubes in exposure calculations?
▼ What is the relationship between EV (Exposure Value) and scene brightness in actual photometric units like lux?
▼ Why do my calculated exposure settings sometimes produce images that look too bright or too dark even though the math is correct?
▼ How do I determine optimal aperture for maximum sharpness versus depth of field requirements in a given scene?
▼ What are the practical limits of ISO in modern cameras, and how does ISO invariance affect exposure strategy?
Free Engineering Calculators
Explore our complete library of free engineering and physics calculators.
Browse All Calculators →🔗 Explore More Free Engineering Calculators
About the Author
Robbie Dickson — Chief Engineer & Founder, FIRGELLI Automations
Robbie Dickson brings over two decades of engineering expertise to FIRGELLI Automations. With a distinguished career at Rolls-Royce, BMW, and Ford, he has deep expertise in mechanical systems, actuator technology, and precision engineering.
Video Walkthrough - How to Use This Calculator
Need to implement these calculations?
Explore the precision-engineered motion control solutions used by top engineers.


