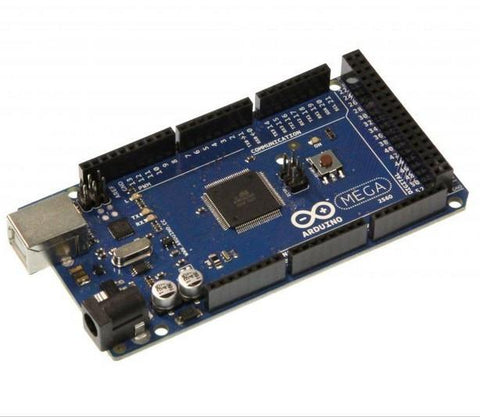
Programming a PLC to control your actuator can be one of the more difficult projects to undertake. It requires trial and error, testing and a heap of patience; though the results can be incredibly functional and rewarding.

This code is for a functional Serial responsive actuator. This is a customer-built code from Nicola Buccoliero, a 24-year-old Italian engineer from Universtà Campus Bio-Medico in Rome, working on their thesis with UPenn.
The Serial feed is a leger of operations an Arduino takes, with additional data sent in or out of the Arduino unit as programmed. With this code, typing a number into the Serial Monitor will tell your Arduino where you want your actuator to move.
Here's what the code does:
-
Initialization (Set Up):
- It sets up the connections to the motor and the actuator feedback sensor.
-
Watching the Serial Monitor for Instructions:
- The Arduino is looking for you to input a number. When it sees a number entered into the Serial Feed, it starts moving the motor.
-
Moving the Motor:
- When the target position is set, the Arduino will begin moving the actuator toward the target. It keeps an eye on the sensor to know when it reaches that point.
-
Stopping at Location:
- As it moves, it keeps checking the sensor. Once the sensor says it's in the right spot, the system stops the motor.
-
Wait for Next Instruction:
- The system will wait for further instruction. When it hears a new message, it starts moving again, following the same process.
This code helps control a motor to go to a specific place, stop there, and be ready to do it all over again when told.
This code is intended to begin with a fully retracted actuator, meaning the "0" position is the fully retracted end of stroke. However, this code will work if the actuator is initialized while extended - you will need to input a negative integer value to move the actuator backwards (ex: -1200)
Nicola's Code// Input / Output Pins
const int motorPin1 = 10; // Pin to control the motor forward
const int motorPin2 = 11; // Pin to control the motor backward
const int sensorPin = 3; // Pin to read the sensor
// Variables
int speed = 255; // Adjust to change actuator speed (0-255)
int sensorValue = 0;
int previousSensorValue = 0;
int motorChangeCount = 0;
int lastStoppedCount = 0;
int targetNumber = 0;
bool motorEnabled = false;
bool waitForCommand = true;
void setup() {
pinMode(motorPin1, OUTPUT);
pinMode(motorPin2, OUTPUT);
pinMode(sensorPin, INPUT);
Serial.begin(115200);
}
void loop() {
if (!motorEnabled && Serial.available() > 0) {
targetNumber = Serial.parseInt();
if (targetNumber != 0) {
Serial.print("Target number: ");
Serial.println(targetNumber);
motorEnabled = true;
analogWrite(motorPin1, speed); // Move forward
analogWrite(motorPin2, 0); // Stop
// Set the counter to the stopped value, considering the difference between targetNumber and lastStoppedCount
if (targetNumber > lastStoppedCount) {
motorChangeCount = lastStoppedCount + 1; // Start from +1
} else if (targetNumber < lastStoppedCount) {
motorChangeCount = lastStoppedCount - 1; // Start from -1
} else {
motorChangeCount = lastStoppedCount; // Keep the same value
}
waitForCommand = true; // Wait for a new input from the serial
}
}
if (motorEnabled) {
sensorValue = digitalRead(sensorPin);
if (sensorValue == 1 && previousSensorValue == 0) {
if (motorChangeCount < targetNumber) {
motorChangeCount++;
} else if (motorChangeCount > targetNumber) {
motorChangeCount--;
}
Serial.print("Change from 0 to 1: ");
Serial.print(motorChangeCount);
Serial.print(" - Target number: ");
Serial.println(targetNumber);
}
previousSensorValue = sensorValue;
if (motorChangeCount < targetNumber) {
analogWrite(motorPin1, speed); // Move forward
analogWrite(motorPin2, 0);
} else if (motorChangeCount > targetNumber) {
analogWrite(motorPin1, 0);
analogWrite(motorPin2, speed); // Move backward
} else {
analogWrite(motorPin1, 0); // Stop the motor when the motor count corresponds to the target number
analogWrite(motorPin2, 0);
motorEnabled = false;
Serial.println("Motor stopped. Awaiting a new number.");
lastStoppedCount = motorChangeCount; // Store the value of motorChangeCount when the motor stops
waitForCommand = true; // Wait for new instructions
}
}
}
// Code by Nicola Buccoliero