Step-by-Step Guide: Using an Arduino to Control an Actuator for Automatic Open and Close
Lets assume you have a project where you want an Actuator to automatically extend and retract every few minutes all day every day. How would you do that and what do you need, and more importantly what is the Arduino code required. The Code can be easily adjusted for different times and you dont have to be a coder to figure this out. We lay it all out below.

What is required to create an automatic time-based Actuator cycle:
To set up an Arduino-based system to automatically extend and retract an actuator every 30 minutes using a DPDT relay, you will need the following hardware:
- Arduino board - This can be any Arduino board, such as the Arduino Uno or Arduino Nano. It will serve as the brain of the system and control the actuator and relay. To buy Arduino micro controller click here
- 12V electric linear actuator - This is the actuator that will extend and retract automatically every 30 minutes. Make sure that the actuator is rated for the voltage and current that you plan to use. To buy a 12v Actuator click here
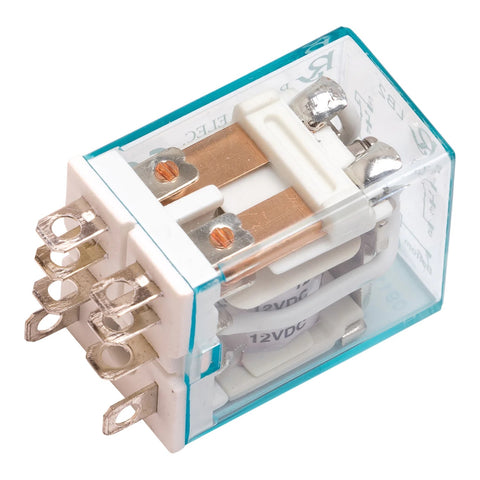
- DPDT relay - This relay will be used to switch the polarity of the power supply to control the actuator's direction of movement. Make sure that the relay is rated for the voltage and current that you plan to use. To buy a DPDT relay click here
- Power supply - You will need a 12V power supply to power the actuator and relay. To buy a Power supply click here
- Jumper wires - These wires will be used to connect the Arduino, actuator, and relay together.
- Breadboard (optional) - A breadboard can be used to make prototyping and connecting components easier.
- Enclosure (optional) - An enclosure can be used to house the Arduino, actuator, and relay and protect them from the elements.
Once you have all of the necessary hardware, you can begin setting up the system by connecting the components together according to the wiring diagram and uploading the appropriate code to the Arduino board. It's important to make sure that all connections are properly made and that the actuator and relay are properly rated for the voltage and current that you plan to use.
Different Programming and set-up options
There are 2 ways to program this. One way is to use a DPDT (Double Pole Double Throw) relay system. The other way is to use a servo system. and the code for each is different (Both are below)
The main difference between using a servo and a relay to control an actuator using an Arduino is the way that the actuator is controlled.
In the code that uses a servo to control the actuator, the servo is connected to the Arduino and used to physically move the actuator by rotating a shaft. The position of the shaft is determined by the signal sent from the Arduino to the servo, which is based on the values set in the code. The servo is able to precisely control the position of the actuator, making it a good choice for applications that require precise positioning.
In the code that uses a DPDT relay to control the actuator, the relay is connected to the Arduino and used to switch the polarity of the power supply to the actuator, causing it to move in either direction. The position of the actuator is determined by the amount of time that the power is applied to the actuator, which is controlled by the delay times set in the code. This method is less precise than using a servo, as the actuator's position is determined by the duration of the power supply rather than by a physical position sensor.
Another difference between using a servo and a relay is the power requirements. Servos typically require a lower voltage and current than relays, which can make them easier to power and use in some applications. Additionally, servos are generally more expensive than relays, which can make them a less practical choice for some applications where cost is a concern.
Ultimately, the choice of whether to use a servo or a relay to control an actuator using an Arduino will depend on the specific requirements of the application, including the need for precise positioning, power requirements, and cost considerations.
DPDT Relay Method:
if you prefer to use a DPDT relay to control your actuator instead of a servo, you can modify the code accordingly. Here is some sample code that will extend and retract an actuator every 30 minutes using an Arduino and a DPDT relay:
Here is the Arduino code:
int actuatorPin = 9; // set the pin that the actuator is connected to
int relayPin = 8; // set the pin that the relay is connected to
void setup() {
pinMode(actuatorPin, OUTPUT); // set the actuator pin as an output
pinMode(relayPin, OUTPUT); // set the relay pin as an output
}
void loop() {
digitalWrite(relayPin, LOW); // set the relay to the first position (connects actuator to negative/ground)
digitalWrite(actuatorPin, LOW); // retract the actuator
delay(1800000); // wait 30 minutes (in milliseconds)
digitalWrite(relayPin, HIGH); // set the relay to the second position (connects actuator to positive/voltage)
digitalWrite(actuatorPin, HIGH); // extend the actuator
delay(1000); // wait 1 second to allow the actuator to fully extend before retracting again
}
In this code, the DPDT relay is connected to the actuator and the power supply, allowing it to switch the polarity of the power supply to control the actuator's direction of movement. The digitalWrite() function is used to set the relay pin to either LOW or HIGH to switch the relay to the appropriate position, and the digitalWrite() function is also used to set the actuator pin to either LOW or HIGH to control the direction of movement. The delay times are the same as in the previous code.
Please note that you will need to make sure that the relay is properly wired and connected to the correct pins on the Arduino and actuator to ensure proper operation. Additionally, you may need to adjust the pin numbers and delay times to match your specific actuator and application.
Servo Method:
Here is some sample code that will extend and retract an actuator every 30 minutes using an Arduino:
#include <Servo.h>
Servo actuator; // create a servo object to control the actuator
int actuatorPin = 9; // set the pin that the actuator is connected to
void setup() {
actuator.attach(actuatorPin); // attach the servo object to the actuator pin
}
void loop() {
actuator.write(0); // retract the actuator
delay(1800000); // wait 30 minutes (in milliseconds)
actuator.write(180); // extend the actuator
delay(1000); // wait 1 second to allow the actuator to fully extend before retracting again
}
This code above uses the Servo library to control the actuator, and the attach() function is used to connect the servo object to the actuator pin. In the loop() function, the actuator is first retracted by writing a value of 0 to the servo, and then a delay of 30 minutes (1800000 milliseconds) is added using the delay() function. After 30 minutes have passed, the actuator is extended by writing a value of 180 to the servo, and a delay of 1 second is added to allow the actuator to fully extend before retracting again. The loop then repeats, causing the actuator to extend and retract every 30 minutes.
Please note that you may need to adjust the pin number and delay times to match your specific actuator and application. Additionally, it is important to make sure that the actuator is properly wired and connected to the correct pin on the Arduino to ensure proper operation.
What are the bennefits of using an Arduino controller?
Using an Arduino controller has several benefits, including:
- Low Cost: Arduino controllers are relatively inexpensive, making them an accessible option for hobbyists, students, and professionals alike.
- Easy to Use: Arduino controllers are designed to be user-friendly and easy to learn, with a large community of users and developers who provide support and resources.
- Versatile: Arduino controllers can be used in a wide range of applications, from controlling simple LED lights to complex robotics and automation systems.
- Open Source: The Arduino platform is open-source, meaning that the design and software are freely available for anyone to use and modify, fostering a collaborative and innovative community.
- Interoperability: Arduino controllers are compatible with a wide range of sensors, actuators, and other electronic components, making them easy to integrate into existing systems.
- Scalable: Arduino controllers can be scaled up or down depending on the requirements of the application, making them a flexible and adaptable option.
- Educational: Arduino controllers are widely used in educational settings, providing students with a hands-on learning experience in electronics, programming, and robotics.
Overall, using an Arduino controller can provide a low-cost, versatile, and easy-to-use solution for a wide range of applications, from hobbyist projects to industrial automation systems.
Are there any other ways to use an Arduino to control an actuator to open and close automatically at times intervals?
Yes, there are other ways to use an Arduino to control an actuator to open and close automatically at time intervals. Here are a few examples:
- Using a motor driver: Instead of using a servo or relay, you can use a motor driver to control the direction and speed of the actuator. A motor driver allows you to control the power going to the actuator using pulse width modulation (PWM). By varying the PWM signal, you can control the speed and direction of the actuator. You can use the Arduino's analog output pins to send a PWM signal to the motor driver and control the actuator's movement.
- Using a stepper motor: Stepper motors are motors that move in discrete steps rather than continuously rotating. By controlling the number of steps the motor takes, you can control the position of the actuator. You can use a stepper motor driver and the Arduino's digital output pins to control the number of steps the motor takes, and thus control the position of the actuator.
- Using an H-bridge: An H-bridge is an electronic circuit that allows you to control the direction of a DC motor. You can use an H-bridge to control the direction of the actuator and an Arduino to control the H-bridge. By changing the direction of the current flowing through the actuator, you can control the direction of the actuator's movement.
- Timed Relay: A timed relay is a device that provides a delayed connection or disconnection of electrical power to the actuator. The time delay can be adjusted using a timer or other control device.
- Programmable Logic Controllers (PLCs): PLCs are a type of industrial computer that can be programmed to control a wide range of equipment, including actuators. They can be programmed to open and close the actuator based on specific timing criteria.
- Digital Timers: Digital timers are simple devices that can be programmed to control the actuator based on specific timing criteria.
- Sensors: Sensors can be used to detect changes in the environment, such as light or temperature, and trigger the actuator to open or close based on specific timing criteria.
- Wireless Remote Control: A wireless remote control can be used to open and close the actuator based on specific timing criteria.
These are just a few examples of ways to use an Arduino to control an actuator to open and close automatically at time intervals. The specific method you choose will depend on the requirements of your application, including the type of actuator you're using and the level of control you need over its movement.
Check out our Arduino controllers here
Click here


